Reolink NVR Connection Failed? (Try These Simple Fixes!)
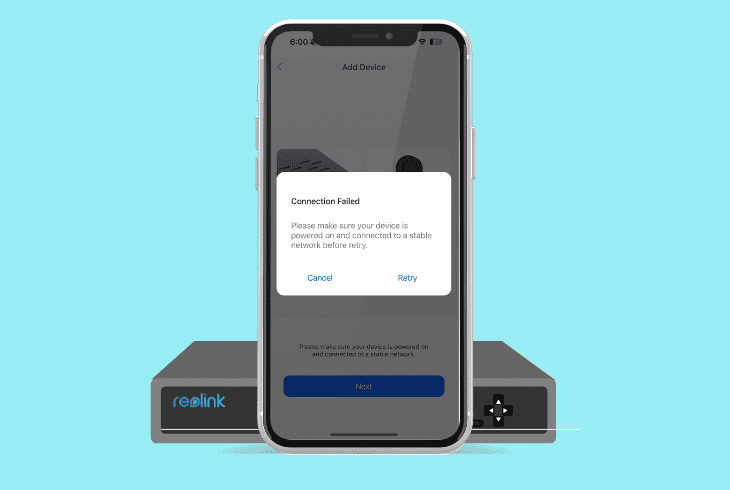
The “Reolink NVR connection failed” message could be bothersome at first, but be assured that it’s quick and easy to resolve.
The most common culprits often include network problems, outdated firmware, or even the settings of your network router.
We will unwrap the most helpful solutions for the connection error of your Reolink NVR and thoroughly break down the causes for the problem.
How to Fix the “Reolink NVR Connection Failed” Error?
Note: Have you checked if the “Power” LED of the Reolink NVR is lit?
1. Check the LAN Port LED Indicator
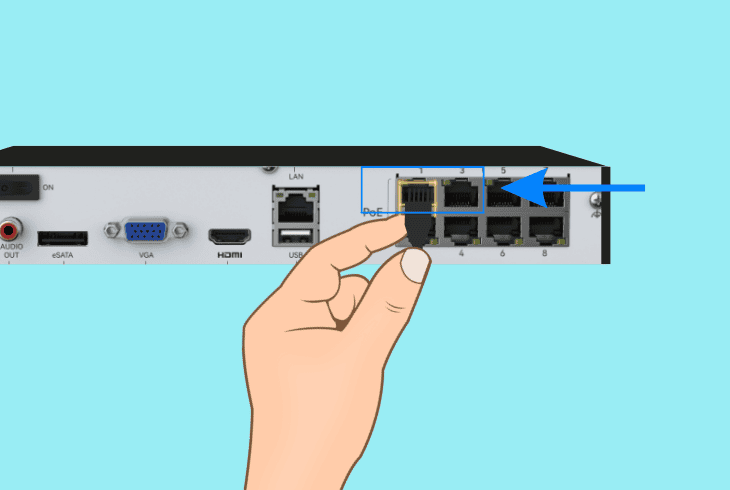
The error message might range from a loose Ethernet connection to an outdated firmware of the NVR. So, the only way to know is to start checking off each of the potential causes, one by one.
The Ethernet port on the back of the Reolink NVR allows for a direct network router connection.
Similar to any other Ethernet port (Cat 5e, Cat 6e) cable, it must blink if there is a successful data transfer.
So, if it doesn’t, then the error is most certainly caused by the router connection.
Step #1 Secure the Ethernet Cable:
If the LAN lights are off, ensure the Ethernet cable between the NVR and network router is firmly plugged in at both ends to restore the connection and the blinking LED.
Step #2 Restart the NVR and Router:
Simply, turn off both the NVR and router, wait 30 seconds, then power them back on in order to temporarily shut down the network.
Step #3 Use a Different Router Port:
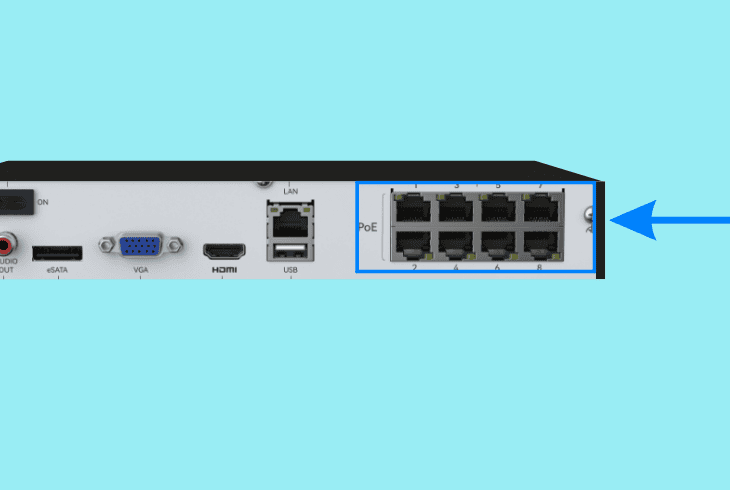
Reconnect the Ethernet cable to another port on your router to determine if the fault is with the LAN input on the NVR or the router.
Step #4 Try a Different Ethernet Cable:
Replace the current Ethernet cable with a new one, as a faulty cable can disrupt the connection and cause the appearance of the “Connection Failed” error.
2. Connect the Router Directly to the NVR
Any external third-party devices, such as A/C switches or extenders, can disrupt the connection between the network router and your Reolink NVR.
A direct connection can resolve underlying issues with the setup and restore the functionality.
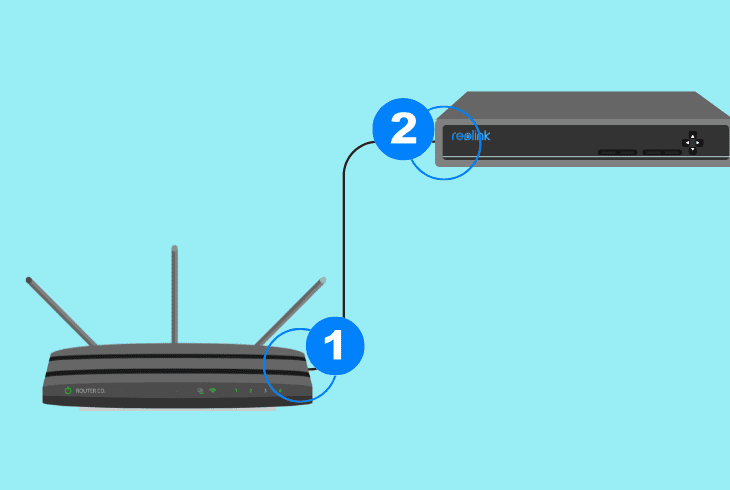
Hence, temporarily uninstall any switches, extenders, or access points between the NVR and router, then plug the NVR directly to the router using an Ethernet cable.
Power on both devices, wait for the LAN lights to activate, and check the Reolink application to confirm your connection.
Note: Restart both devices after reseating the Ethernet cable to address any faults.
3. Check/Adjust the NVR Network Settings
Incorrect network settings on your NVR could be another reason why the Reolink NVR connection failure error.
So, adjusting these settings by switching between DHCP and Static IP can help resolve the network connectivity.
Step #1 Access Network Settings via Monitor
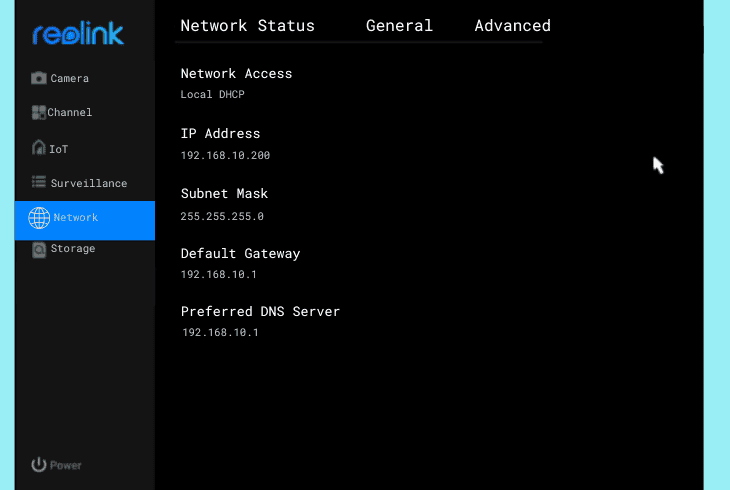
First, connect a monitor to the NVR using an HDMI or VGA cable and make sure the NVR interface is accessible.
Now, follow these steps to access the Reolink network options:
- On the NVR home, click Menu for the old UI or Device Settings for the new UI.
- Navigate to Network > General (old UI) or Network > Network Status (new UI).
- Now, view the current network settings displayed on the screen for adjustments.
Step #2 Test DHCP and Static IP Settings
In the network settings page, note or photograph the current setup, then test switching between DHCP (automatic IP assignment) and Static IP (manual IP entry) from the options.
Now, after the adjustments, the NVR should reconnect automatically if the settings are synced.
4. Power Cycle the Reolink NVR & Router
A simple power cycle can resolve underlying issues with the network that prevent the NVR from establishing a network connection.
This procedure “drains” the electrical power supply of both devices and clears any minor errors, and restores connectivity.
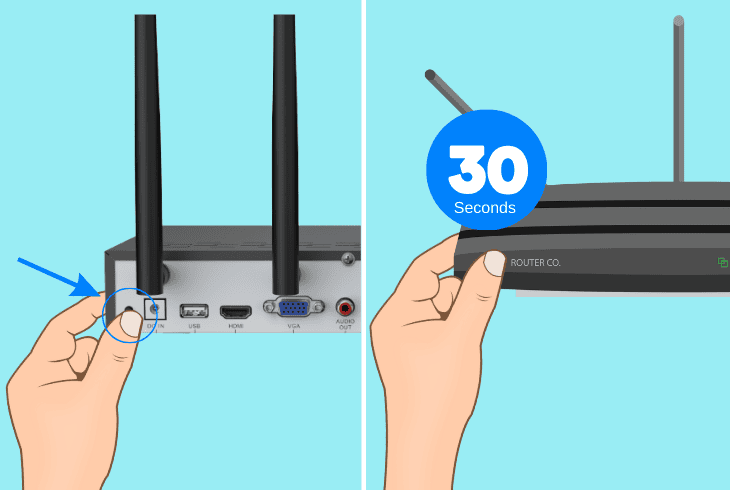
Let’s start with the NVR first!
4.1 How to Power Cycle the Reolink NVR:
- Press the Power button to shut down the NVR.
- Disconnect the power cable from the A/C outlet.
- Wait ~30 seconds to allow the NVR discharge.
- Reconnect the NVR power cable back into the A/C.
4.2 How to Power Cycle the Router:
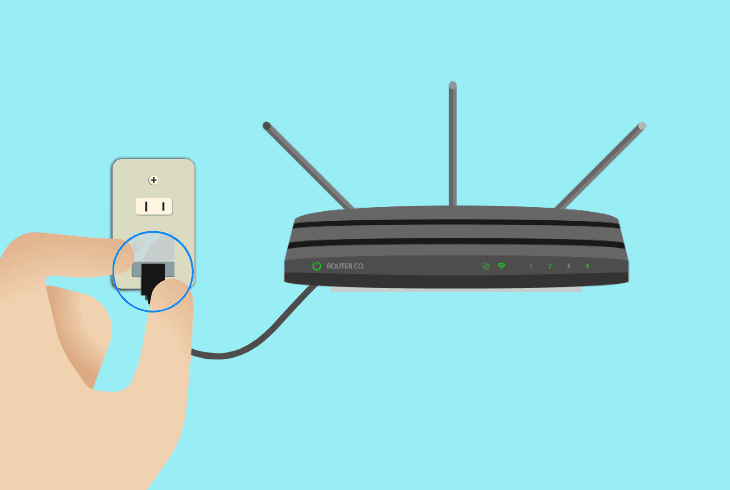
- Unplug your router from the power source.
- Wait 30 seconds to ensure the router drains.
- Plug the router back in and wait for a reboot.
Note: Wait until all of the network lamps on the router illuminate green before testing the NVR.
5. Update the Reolink NVR OS Version
An outdated firmware version might prevent the NVR from establishing a secure connection with the network by disabling a variety of features.
Updating the NVR firmware via the Reolink software can resolve this problem and ensure proper NVR network connection.
There are two types of NVR OS updates–“online” and “manual”.
Option #1 NVR Online Firmware Update:
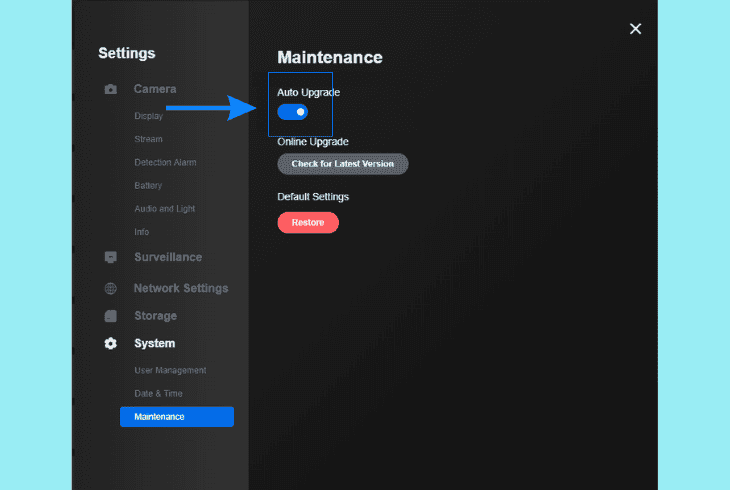
- Connect the NVR, camera, and computer to the internet.
- Open the Reolink software and go to the Upgrade page.
- Allow the software to check for available firmware updates.
- Follow the on-screen steps to initiate the firmware update.
- Enable “Auto Update” for future automatic NVR updates.
Option #2 NVR Manual Firmware Update:
- Go to the Reolink Download Center to find the latest firmware.
- Compare the build numbers to confirm an update is needed.
- Download the firmware zip file and unzip it to access the OS.
- Next, follow the manual upgrade guide to install the firmware.
After updating, enable the “Auto Update” or check the Download Center regularly to keep your system up-to-date.
If the connection error persists, then the fault may not be with the NVR at all.
6. Reconfigure the Router GUI Settings
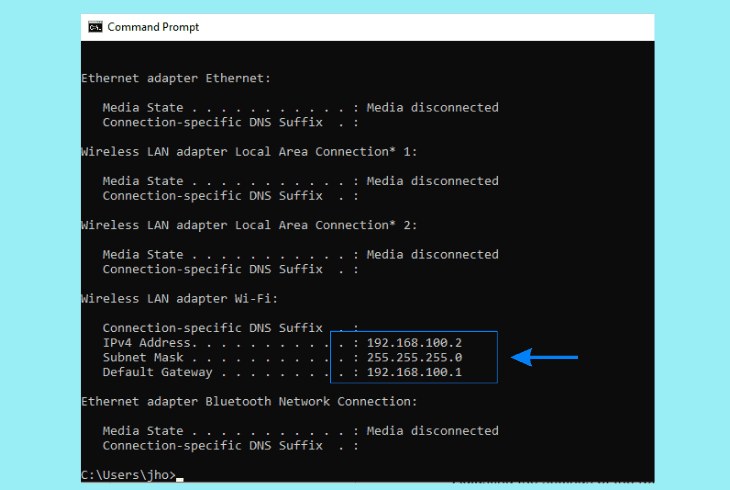
Misconfigured router settings could almost certainly lead to the Reolink NVR camera connection failed error.
So, adjusting specific settings in the GUI of your network router can ensure the NVR connects properly without interference.
- To access the router GUI, open a browser, enter the router’s default gateway (usually 192.168.1.1 or 192.168.0.1), log in with the admin username and password (check the router label), and navigate to the settings menu.
Option #1 Firewall:
An active firewall might be suspending the connection request of the NVR, so go to the router’s Firewall settings, look for rules blocking the NVR IP or ports (like 9000 or 8000), and disable those rules temporarily.
Now, save the changes, and test the NVR connection.
Option #2 VPN:
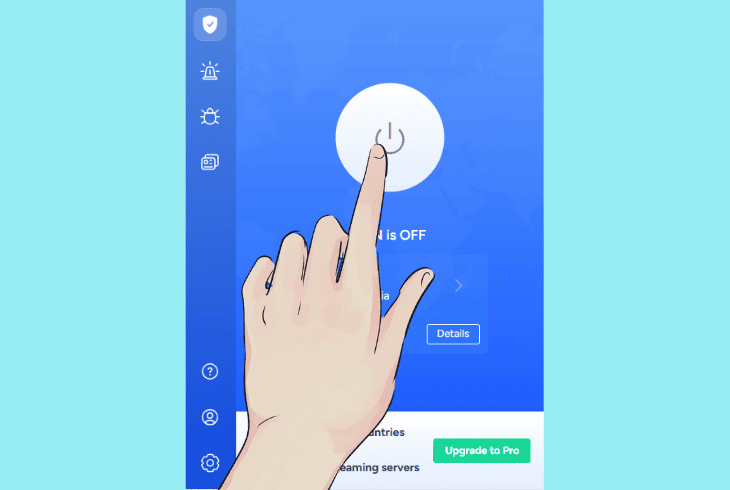
If a VPN is enabled on the router network, it might redirect the NVR traffic improperly.
Hence, find the VPN settings in the router menu, deactivate the VPN service, save the changes, and check if the NVR can connect properly now.
Option #3 MAC Filtering
MAC filtering can restrict the NVR access if the MAC address is disallowed in the list, so go to the MAC Filtering section, turn off the filtering, or add the NVR’s MAC address.
The final step is to save and test the connection again.
Option #4 AP Isolation:
AP Isolation prevents devices on the same network from communicating, which can block the NVR.
To resolve this problem, locate the AP Isolation or Client Isolation setting in the router’s Wi-Fi section, disable it, and save the changes.
Note: Reboot the router after reapplying the new settings for the changes to take effect.
7. Revert the OS of the Reolink Application
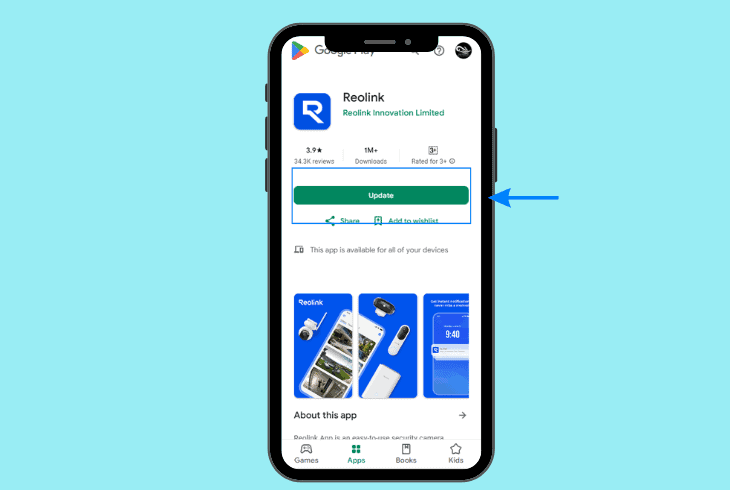
Another cause for the “Connection Failed” error could be a recent app update.
If the error only appears while viewing the live feed of either of the Reolink cameras, it could mean the firmware version of the Reolink mobile application is corrupted.
Reinstall an older stable version, like Android app v4.35.1, by uninstalling the current app and downloading the older APK from a trusted source like the Reolink website.
Then, disable auto-updates in the Google Play Store by going to the app’s page by tapping the three dots, and unchecking “Enable auto-update”.
8. Restore the Reolink NVR to Default Settings
If you’re still facing the Reolink NVR connection failed error, despite trying all solutions so far, a factory reset is almost guaranteed to resolve any non-lasting issues with the NVR.
The reset applies to models like RLN8-410, RLN16-410, RLN36, and RLN12W, with slight step variations.
8.1 How to Reset RLN12W Using the Reset Button:
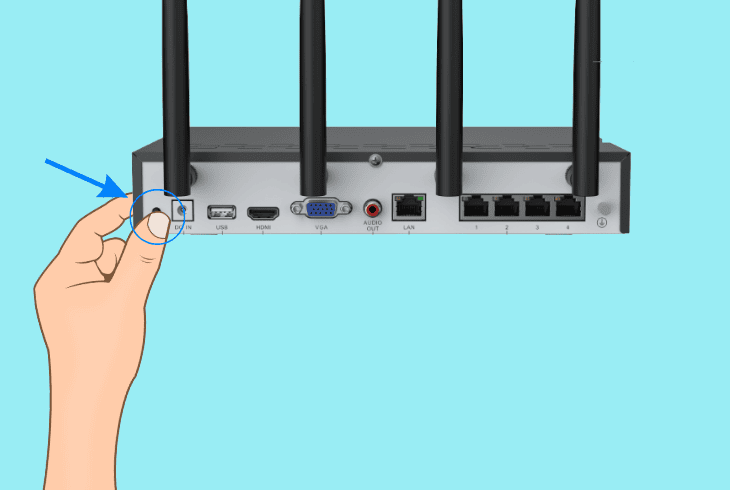
- Confirm the RLN12W NVR is powered on before proceeding.
- Locate the Reset button on the back of the Reolink NVR unit.
- After that, press and hold the button until a “bee” sound plays.
- Finally, follow the instructions from the Initialization Wizard.
8.2 How to Reset RLN8-410, RLN16-410, RLN36 Using the Reset Button:
- Turn off the NVR and use a screwdriver to remove its outer case.
- Next, power the NVR back on and locate the reset button inside.
- Hold the Reset button for 10 seconds until a “beep” sound is heard.
- Check for the Initialization Wizard to complete the reset process.
Alert: Do not interact with the NVR before the reset is complete!

Finn Wheatley, a Master’s graduate in Computer Science from UCL, London, honed his skills at small data science consultancies. There, he helped large corporations enhance their data capabilities by deploying cutting-edge machine learning analytics and resolving technical hurdles.


