Owlet Cam 2 Mounting Instructions? (Setup Made Super Easy!)
If you want to uncover some fresh and unique Owlet Cam 2 mounting instructions, you are at the right place, so search no further.
In this quick guide, we’ll walk you through:
First, let’s see…
What’s in the Box?
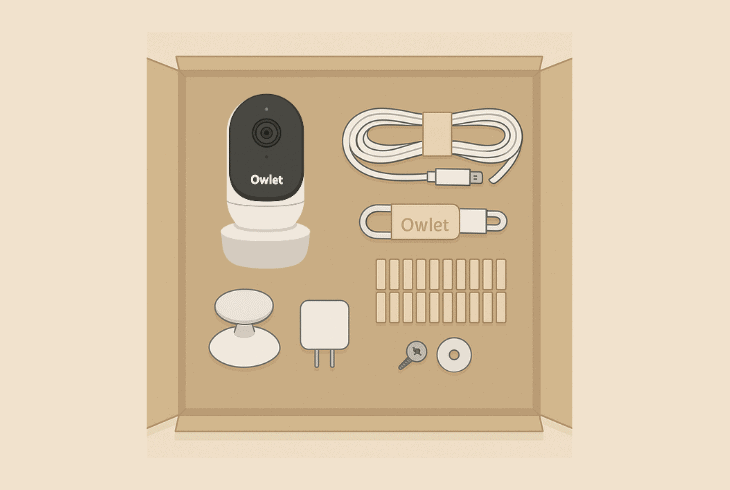
Before proceeding, verify that all of the following equipment is present:
Now, here is the required non-included equipment:
Once you have all of that, you can confidently proceed with the complete installation instructions for your Owlet Cam 2!
Owlet Cam 2 Mounting Instructions – Regular, DIY, or Outdoor!
First, let’s review the intended installation of the Owlet Cam 2, using the mounting kit:
1. Choose a Monitoring Angle for Cam 2
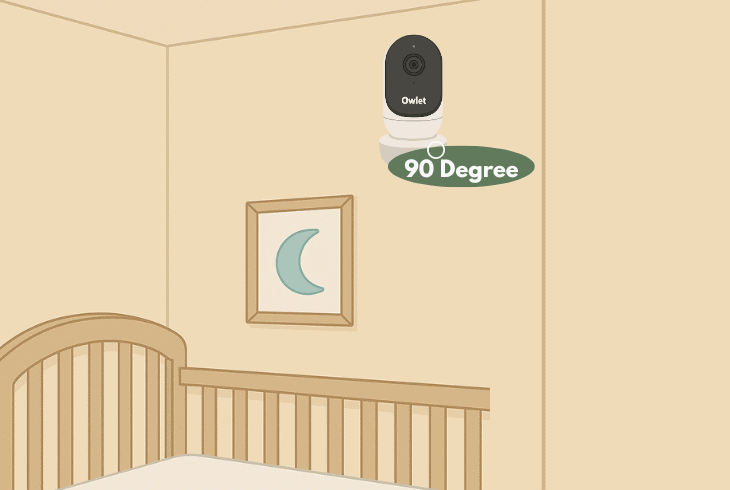
The first and most important step is to define a good monitoring angle for your new camera.
Go around your baby’s crib, and determine which corner or wall placement would deliver a full feed to your baby after successfully installing the camera.
A few good placement recommendations can be:
- Right above the baby crib (on the wall/ceiling)
- In the corner, facing towards the crib from ~90°
- Facing the crib from a flat, horizontal surface.
Remember that the permanent location of the camera must be within 10–15 feet of an electrical outlet.
Consider the length of the power adapter before selecting an angle.
Now, check whether the electrical adapter reaches the outlet before proceeding with the next step in the installation.
2. Measure and Mark the Mounting Site
Once you have defined an installation spot for your Owlet camera, the next step is to create markings for the base that will hold the product in place.
There is an important requirement as to how far your Owlet camera can be from the baby’s crib for optimal and high-quality monitoring.
There are 3 essential requirements for the mounting position:
#1 Distance from the Baby’s Crib:
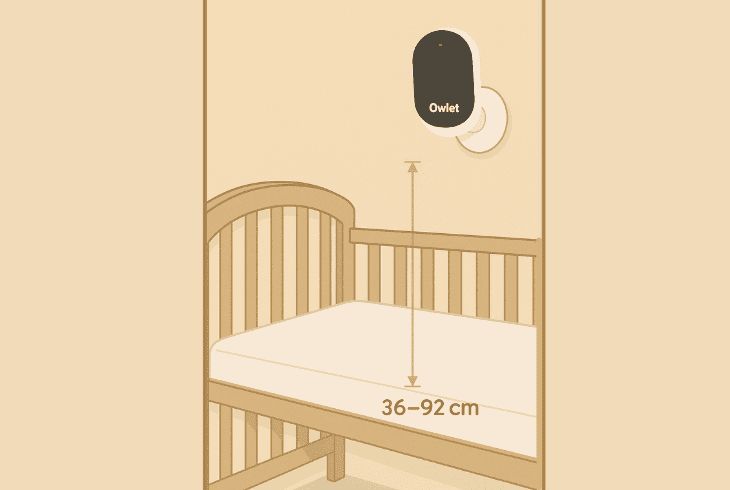
Verify the mounting position is at least 36 inches (~92 cm) from the top of the mattress in the crib.
This is where the stand of the Owlet Cam 2 will stand, and the permanent monitoring angle.
#2 Distance from the A/C Outlet:
As mentioned above, ensure the outlet your Owlet camera will use is within a 36-inch range, or once again, about ~92 cm.
Verify there are no exposed cables within 40 inches of the baby crib.
#3 Temperature Sensor Location:
The temperature sensor of your Owlet camera can be found at the end of the smart cable and must be appropriately exposed to the room’s humidity and temperature.
So, do not stuff it on the back of the crib, because otherwise, the temperature readings might be incorrect.
3. Align and Fasten the Mounting Plate
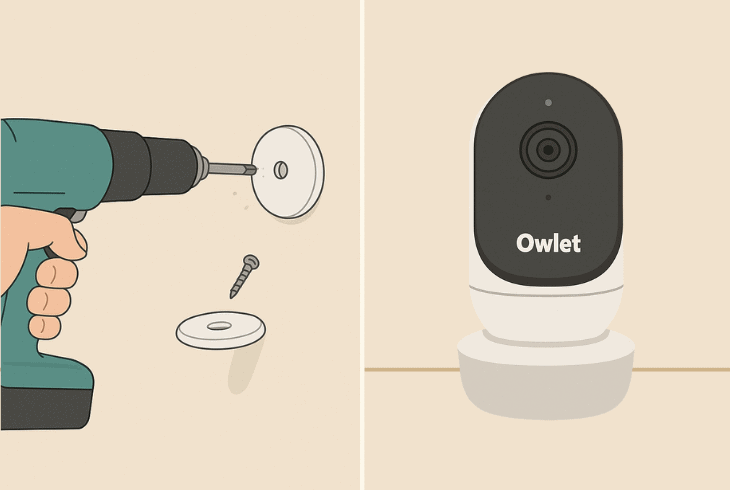
Now, according to the marks you have made in the previous step, align the plate carefully and use the provided bolt to fasten it in place.
It will be used to hold the camera cable and keep it in position at all times, along with the camera’s body itself.
Verify the arrows of the mounting plate are pointing upwards before tightening the screws, or the camera will face upwards when installed.
However, do not overtighten the bolt, as it could break through the mounting plate’s attachment and enter the wall all the way.
4. Prepare & Thread the Camera Cable
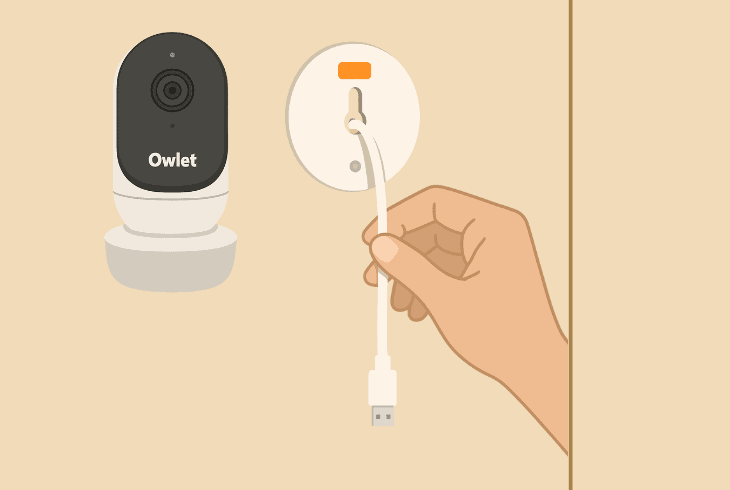
Now that the mounting plate is in place, proceed to remove the wraps from the camera cable and extend it all the way.
Thread it onto the mounting plate and make sure to align the orange sticker at the top of the plate to verify the camera will latch on properly.
⚠️Warning: Verify that the mounting plate is secured on the mounting plate before installing the base on top of it, which will hold your Owlet Cam 2.
5. Mount the Base & Attach the Camera
Now that everything is in place, install the base of your Owlet camera by positioning the large holes of the magnetic table over the corresponding tabs on the mounting plate.
To secure your Cam 2, slide the base downwards until it *clicks* and check if it stays loose or wiggles around.
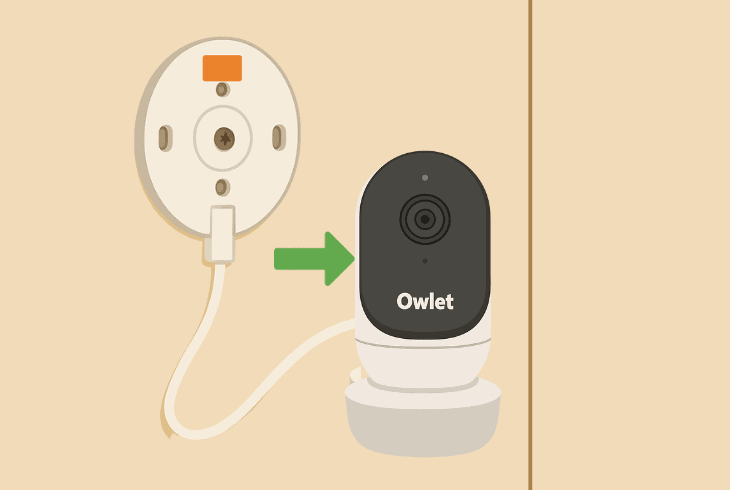
The next step is to proceed with the camera attachment by touching it with the magnetic base and plugging the cable beforehand.
The orange sticker should be placed above the mounting plate, so you have sufficient cable slack to position the Owlet Cam 2 to the desired view/angle.
6. Install the Cable Guards (Important)
The cable guards keep your camera’s cable in place via a high-strength adhesive.
Only proceed with the cable guards application once you are certain about the positioning and alignment of the camera, since once you install the guards, you will no longer be able to adjust your camera.

The cable guards application consists of several easy steps:
- Locate the adhesive cover on the long guard and peel it off.
- After that, thread the cable down the center of the long guard.
- Snap the camera along the guard onto the mounting bottom.
- Next, press it firmly onto the wall in order to attach it securely.
- Now, repeat steps 1 through 4 to reach the wall outlet’s height.
Once the cable guards are in place, proceed with the installation of the L-bracket…
7. Mount your Owlet Cam 2 L-Brackets
The L-brackets are used to guide your camera’s cable in the correct direction towards the wall outlet.
You can put the cable through the opening of the bracket pieces, connect each bracket piece, and verify that the adapter cable is isolated appropriately.
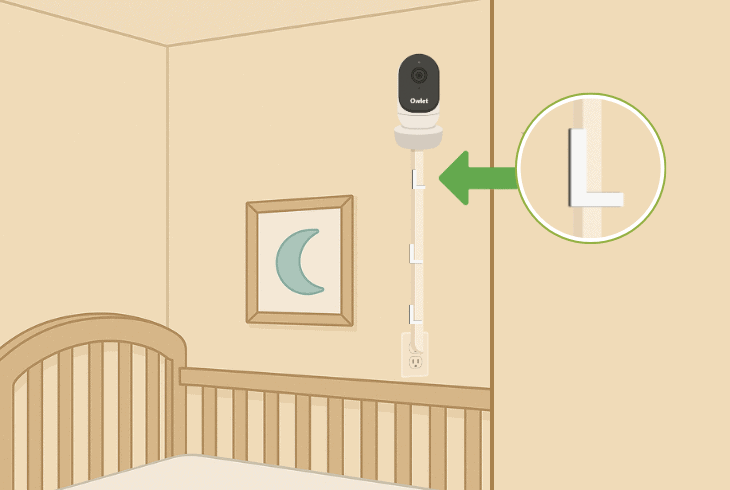
You can wrap the excess cable using velcro to further isolate the installation of the camera and keep any cables away from your little one’s crib.
⚠️Important: The L-bracket is optional, but highly recommended for cable isolation.
How to Mount the Owlet Cam 2 Without the Mounting Kit?
Since most parents find the mounting kit installation complex and a little bit excessive, there are further simpler ways to keep the Owlet Cam 2 in place, watching over your baby.
That’s why we’ve prepared some of the best DIY solutions, including using a self-made stand, adhesive, or even a metal plate.
Here’s how it goes:
#1: Use a Camera Shelf/Floating Shelf

The first solution, as most parents widely prefer, is to position the camera on a floating shelf, right above the baby’s crib.
All you need is a mini corner shelf that has enough space for your Owlet camera, along with a few bolts that will keep it in place, if it is not right above the crib.
It helps by easily supporting the magnetic base of the camera and giving you freedom with alignment angles.
Verify the shelf is at least 36–40 inches above the crib and use the cable clips provided in the mounting kit to secure the cord tightly along the wall.
#2: Use a Tripod or Gooseneck Clamp
A tripod with flexible legs is perhaps the best mounting option for your Owlet Cam 2 if you want to avoid making holes in your wall or using all of the supplied equipment.
Well, all you need is a surface to clamp the tripod or gooseneck on, point it towards the crib, and attach the Owlet.
With such a stand, you can adjust the Owlet Cam 2 as you will and view your baby’s crib from over a hundred different perspectives.
#3: Metal Plate + Commanding Strips
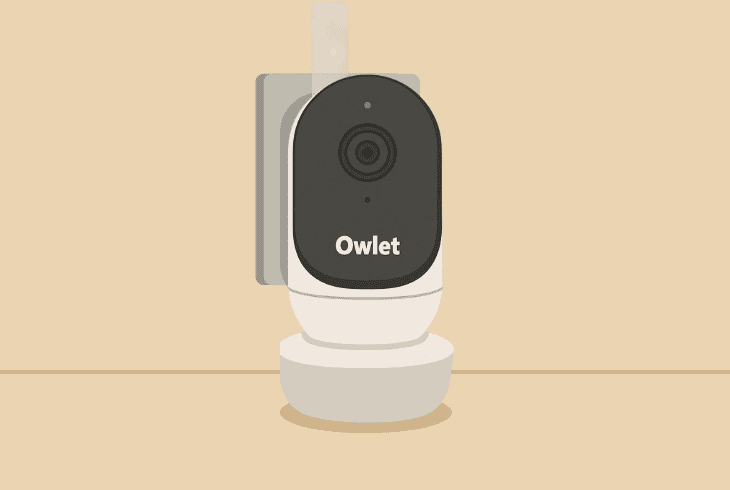
You can produce a reliable mount for your Owlet Cam 2 by using a small, flat metal plate, along with some heavy-duty 3M command strips.
You can use the command strips to stick the metal plate to the wall, then use the magnetic base to keep the camera in place.
However, verify that the mounting surface is clean and dry before applying any of the command strips that will hold the metal plate in place.
Owlet 2 Mounting Instructions for Outdoor Installation!
If you prefer to use the Owlet Cam 2 as a security camera instead, you can mount it outside, in your backyard, for example, to watch over your children as they are playing.
Well, the outdoor installation consists of several simple steps that anyone with no technical expertise can follow.
Step #1: Choose a View Angle Position:

Start by defining a particular installation spot for your Owlet Cam 2.
It must be covered, since the Owlet Cam 2 is not weather-resistant, and it must not have direct exposure to sunlight, rain, or snow.
Well, this is important if you’re about to use your camera in a way it’s not supposed to.
Step #2: Install a Weatherproof Mount:
Now, use an outdoor-rated plastic or even a metal bracket to keep the camera in a stand.
You can use some of the supplied equipment in the mounting kit to help you with your installation.
Step #3: Protecting the Cam 2 Cables:

The final and most important step is to route the power cable for your Owlet Cam 2.
Since the cable is not lengthy, you might be required to use a power strip or a divider to extend the range.
Guide the camera’s power cable to the closest power source and make sure it is protected from weather conditions, as the impact of rain or snow could damage both the cable and the camera.
When your device is in position, it’s time to set up your Owlet Cam 2.
Notice: Keep the camera safe and hidden to avoid potential theft. We advise against relying on the Owlet Cam 2 for complete security of your home.

Finn Wheatley, a Master’s graduate in Computer Science from UCL, London, honed his skills at small data science consultancies. There, he helped large corporations enhance their data capabilities by deploying cutting-edge machine learning analytics and resolving technical hurdles.


