Error Code 775 DIRECTV? (Try This Quick Fix!)

We have all seen error code 775 DIRECTV–“No Dish Communication” error at least once, even if it was during the initial setup.
However, what do you do if it appears suddenly?
Don’t worry–in this ultimate guide, we’ll walk you through everything, so let’s first answer…
What Causes DIRECTV Error Code 775
Error 775 typically means that the DIRECTV receiver can’t communicate with the satellite dish for one reason or another.
There are many possibilities:
That’s quite a lot, isn’t it? Let’s start with the most important first…
How to Test Satellite Signal Strength

As mentioned, error 775 could appear on your DIRECTV receiver when the signal strength is too weak; hence, let’s learn how to test it:
- On the DIRECTV receiver, go to the MENU.
- Move left until you reach the “Satellite” tab.
- Choose the “View Signal Strength” option.
You’re going to see a set of numbers, and here are the results:
- Anything between 90–100 is an excellent signal.
- Anything between 70–90 is a fairly good signal.
- Anything below 70 is not a very good signal.
Tip: If your signal is very bad, jump to step #6.
How to Fix Error Code 775 DIRECTV in 7 Guaranteed Methods?
Note: Have you tried power cycling your receiver by unplugging it from the power?
1. Reauthorize DIRECTV Receiver
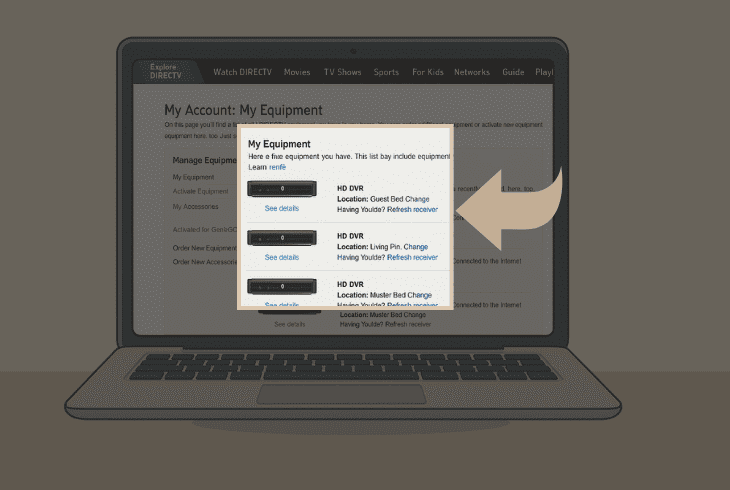
The first step against error code 775 is to refresh (reauthorize) your DIRECTV receiver from the online DIRECTV service.
This helps with signal problems, which is one of the main reasons for error code 775, even if everything on your side is correct.
To reauthorize your DIRECTV receiver, follow these steps:
- On your computer, sign in to your DIRECTV account.
- Then, navigate to the My equipment & services tab.
- Select the DIRECTV receiver you want to reauthorize.
- Click “Refresh receiver” and wait for a minute or two.
Then, check whether error code 775 is still there!
2. Check the Satellite Connections
The next and critical step against error code 775 on a DIRECTV receiver is the link between the satellite dish and receiver.
The link could be slightly different based on how many receivers you have, so let’s walk you through the entire connection.
#1 – Satellite Dish to SWM
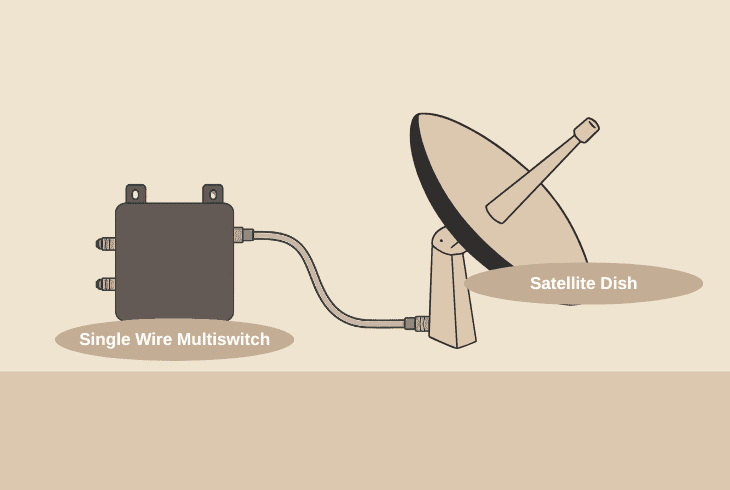
The first connection to inspect would be the Coax link between your satellite dish and the SWM (Single Wire Multiswitch).
There must be a single RG-6 Coax cable running from the dish to the SWM, carrying both the signal and the DC voltage (21V).
With some DIRECTV installations (especially older ones), you may not have a SWM; instead, there are going to be 4 coax lines coming from the dish.
They all plug into a simple multiswitch.
So, make sure that the line, regardless of whether you got a SWM or not, is intact.
If you have access to your satellite dish, it’s recommended to check whether the Coax is connected firmly.
#2 – Inserter to the Splitter
The next critical connection you need to inspect is the RG-6 Coax cable running from the SWM power inserter to your splitter (if any).
If you only have one DIRECTV receiver, there is a good chance that you have no splitter and the connection is direct.
However, if you have multiple receivers, then a splitter is involved, unless you’re using an old and standard multiswitch, not SWM.
Verify that the Coax is securely connected to the splitter.
#3 – Splitter to the Receiver
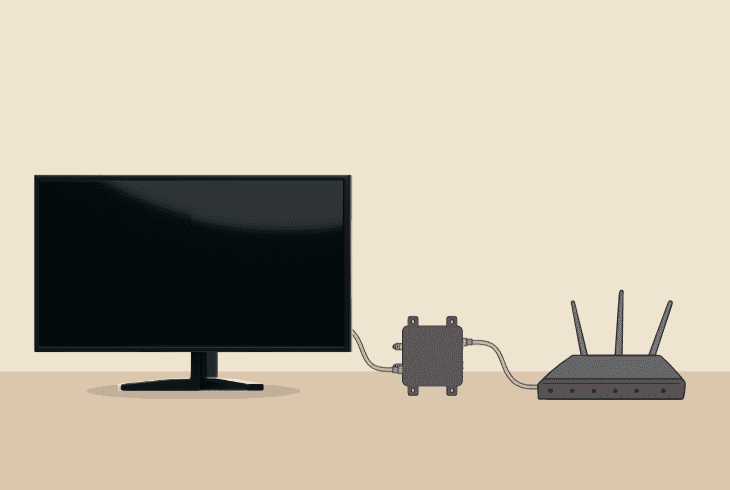
The final connection to inspect is the one connecting your splitter to the DIRECTV receiver.
You must verify that the splitter, for example, “OUT 1”, is securely connected via coax to the receiver “SAT IN” port on the back. Again, here is the same RG-6 Coax cable that you need to inspect.
⚠️Important: While doing the inspection, verify that all Coax connectors and barrel couples are intact and check for anything loose, corroded, or worn out.
3. Test the Voltage on the Coax Line
If your connections are intact, but your DIRECTV receiver still shows error code 775, we need to ensure that your satellite dish is working.
The satellite dish withdraws power from the Coax cable coming from the dish, plugging into the SWM, so we need to test the voltage.
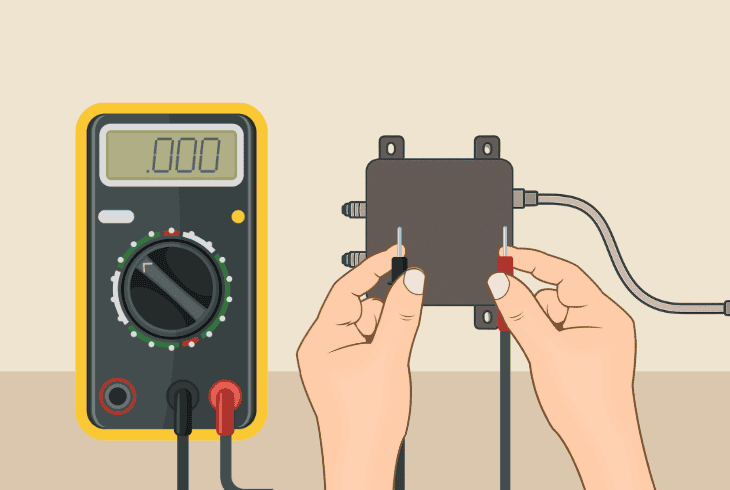
Here’s how:
The Multimeter should read 21 volts DC (or somewhere between 20.5V and 22V). If you see infinite readings or 0V, this means that your SWM is not receiving power.
In short, the dish is not working, and that’s why error 775 appears on your DIRECTV receiver.
If the power from the inserter is OK, continue reading…
4. Update your DIRECTV Receiver
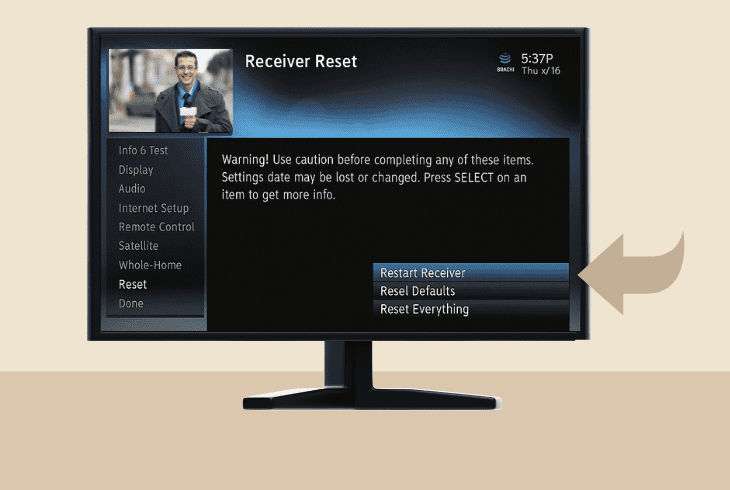
Another thing to try against the error code 775 on the DIRECTV receiver is to update the system of your device.
Well, code 775 indicates that the receiver can’t communicate with the dish, but if you can update the device, this signals that the problem may not be with your connection at all.
To update the receiver, you must first reboot it by going to the MENU → “Settings & Help” → “Settings” → “Reset” → “Restart Receiver”.
Immediately after you see the first blue screen, press 0 → 2 → 4 → 6 → 8 on your remote!
Your DIRECTV receiver will start searching for a new update. If the progress bar starts moving, the first thing that this tells us is that there is a connection to the dish.
There is a high chance that the error will disappear after the update is complete, so wait it out.
5. Factory Reset DIRECTV Receiver
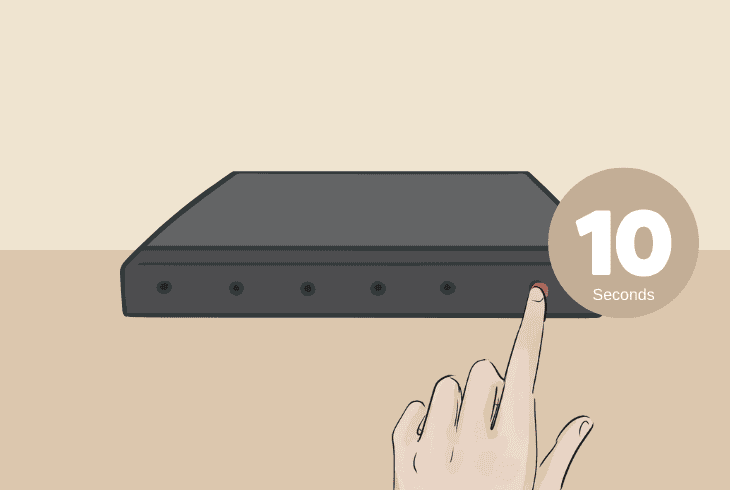
If you’re still facing DIRECTV error code 775, it’s time to factory reset the receiver, which should resolve all connection-related problems on a software level.
This process will erase everything on your DIRECTV receiver, such as picture settings, channels, and all of your personalization.
To factory reset your DIRECTV receiver, locate the “Reset” button (typically small and red) on the side of your receiver or inside the access door.
Press and hold the button for ~10 seconds or until the receiver restarts!
Note: When the reset is completed and the receiver reboots, it will automatically start to search and download your DIRECTV channel lineup.
6. Check the DIRECTV Satellite Dish
Error 775 on a DIRECTV receiver could appear because the signal is way below the threshold needed for watching satellite TV.
If that’s the case, you would need to check whether the dish is pointed the correct way based on your ZIP code, if the Coax is plugged in, and if it’s obstructed.
That’s three steps we’ll need to go over:
#1 – Inspect the Coax Cable Connection:
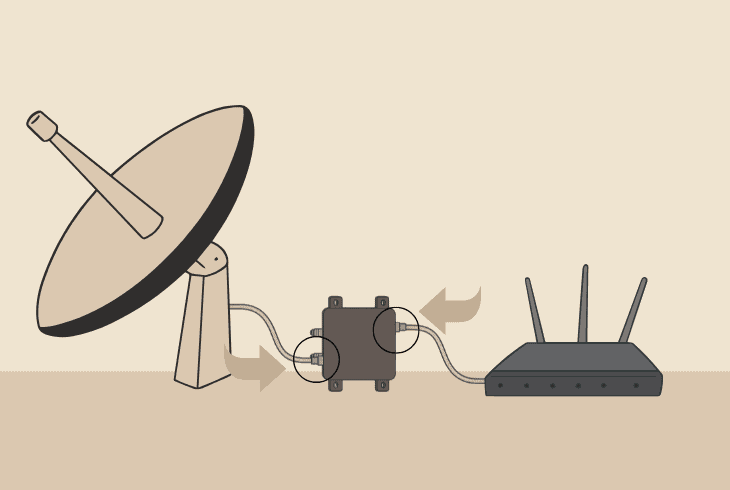
The first step is to ensure that the RG-6 Coax cable coming from your SWM is firmly connected to the dish’s coaxial port.
If it’s wiggly, loose, corroded, or anything is unusual, this might be why you’re seeing error code 775 on your DIRECTV receiver.
#2 – Verify the Dish is Pointed Correctly:
It’s possible that your dish has lost grip on its stand and is now not pointed correctly according to the correct Elevation and Azimuth as per your zip code.
You can always use the DIRECTV Dish Pointer Tool to get the correct Elevation and Azimuth and correctly adjust your satellite.
#3 – Remove Potential Dish Obstruction:
The signal of your satellite dish could severely worsen in case of snow buildup, fallen leaves, or anything else covering the LNBs.
This is the small device mounted on the end of the dish arm that is facing the dish’s surface, so make sure to clean it.
When you’re ready, perform another signal test of strength!
7. Try to Bypass the Coaxial Splitter
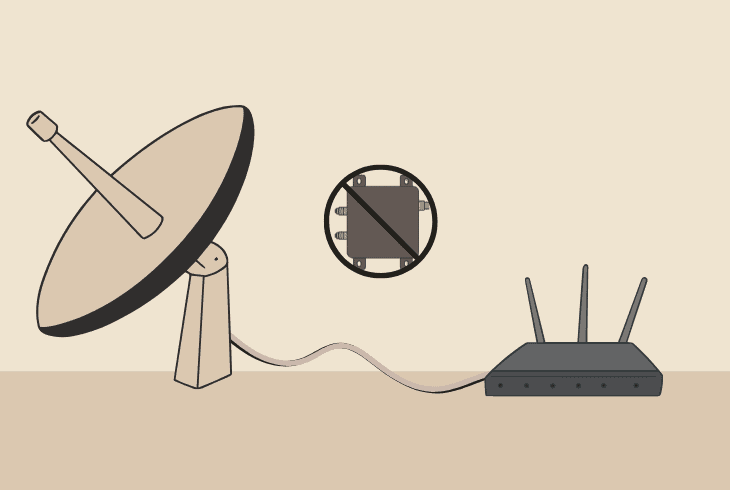
If you’re still facing error code 775 DIRECTV, the last thing you could try before jumping to conclusions is bypassing your coaxial splitter.
Well, even if you have multiple receivers, maybe the port on the splitter is not working, or the cable running to your DIRECTV receiver is defective.
So, disconnecting the splitter and linking the DIRECTV receiver directly to the SWM will show you a lot about where the issue originates.
Note: If you can’t identify the issue on your own, get in touch with DIRECTV Support for more help!

Finn Wheatley, a Master’s graduate in Computer Science from UCL, London, honed his skills at small data science consultancies. There, he helped large corporations enhance their data capabilities by deploying cutting-edge machine learning analytics and resolving technical hurdles.


